Pearl Embellished Loafers diy post

April 13, 2017 1 Comment
pearl embellished loafers diy

Today's post is another DIY and I'm showing you a pearl embellished loafers diy. As pearl embellishment is everywhere at the moment I really wanted to create something quick and simple but that will add that extra touch to a simple pair of shoes. Gucci has given us the pearl loafer and you'll find versions of them all over the High Street. Here's how to make your own for a fraction of the price. 
I've used a pair of Primark loafers which were £8 but you could use any pair you can find and any colour too. Pearls wise you want nice quality ones and it doesn't matter if they have holes in. I got mine from a broken necklace and they were in a range of sizes. If you don't want to worry about holes then you could buy hole free pearls. Glue wise you want a really good strong glue thats flexible and dries clear. I'm using Hi-Tack.

you will need

PEARLS | SHOES OR SANDALS | GOOD GLUE | COTTON BUDS

pearl embellished loafers diy

STEP ONE

STEP TWO

Decide on your order/arrangement of pearls and line them up ready.

Start from the centre of the shoe and apply a good sized dot of glue.
Place your first pearl in the centre with the holes on each side.

pearl embellished loafers diy

STEP THREE

Apply another dot of glue for the next pearl and apply glue to the side of the pearl where the hole is.
Place this pearl next to your first and push together.

STEP FOUR

I would suggest glueing the middle three pearls and then leave them to dry. This means you wont nudge the line when you apply the next ones.

pearl embellished loafers diy

STEP FIVE

Finish off the line with the two end pearls. Again apply glue to the underneath of the pearl and the side so they stick together. Keep the holes at the side so they are hidden by the pearl next to it.

STEP SIX

You can clean up any excess glue with a cotton bud.
Leave the shoes to dry overnight till the glue goes clear. Add glue in between any pearls that need it.

FINISHED!

pearl embellished loafers diy

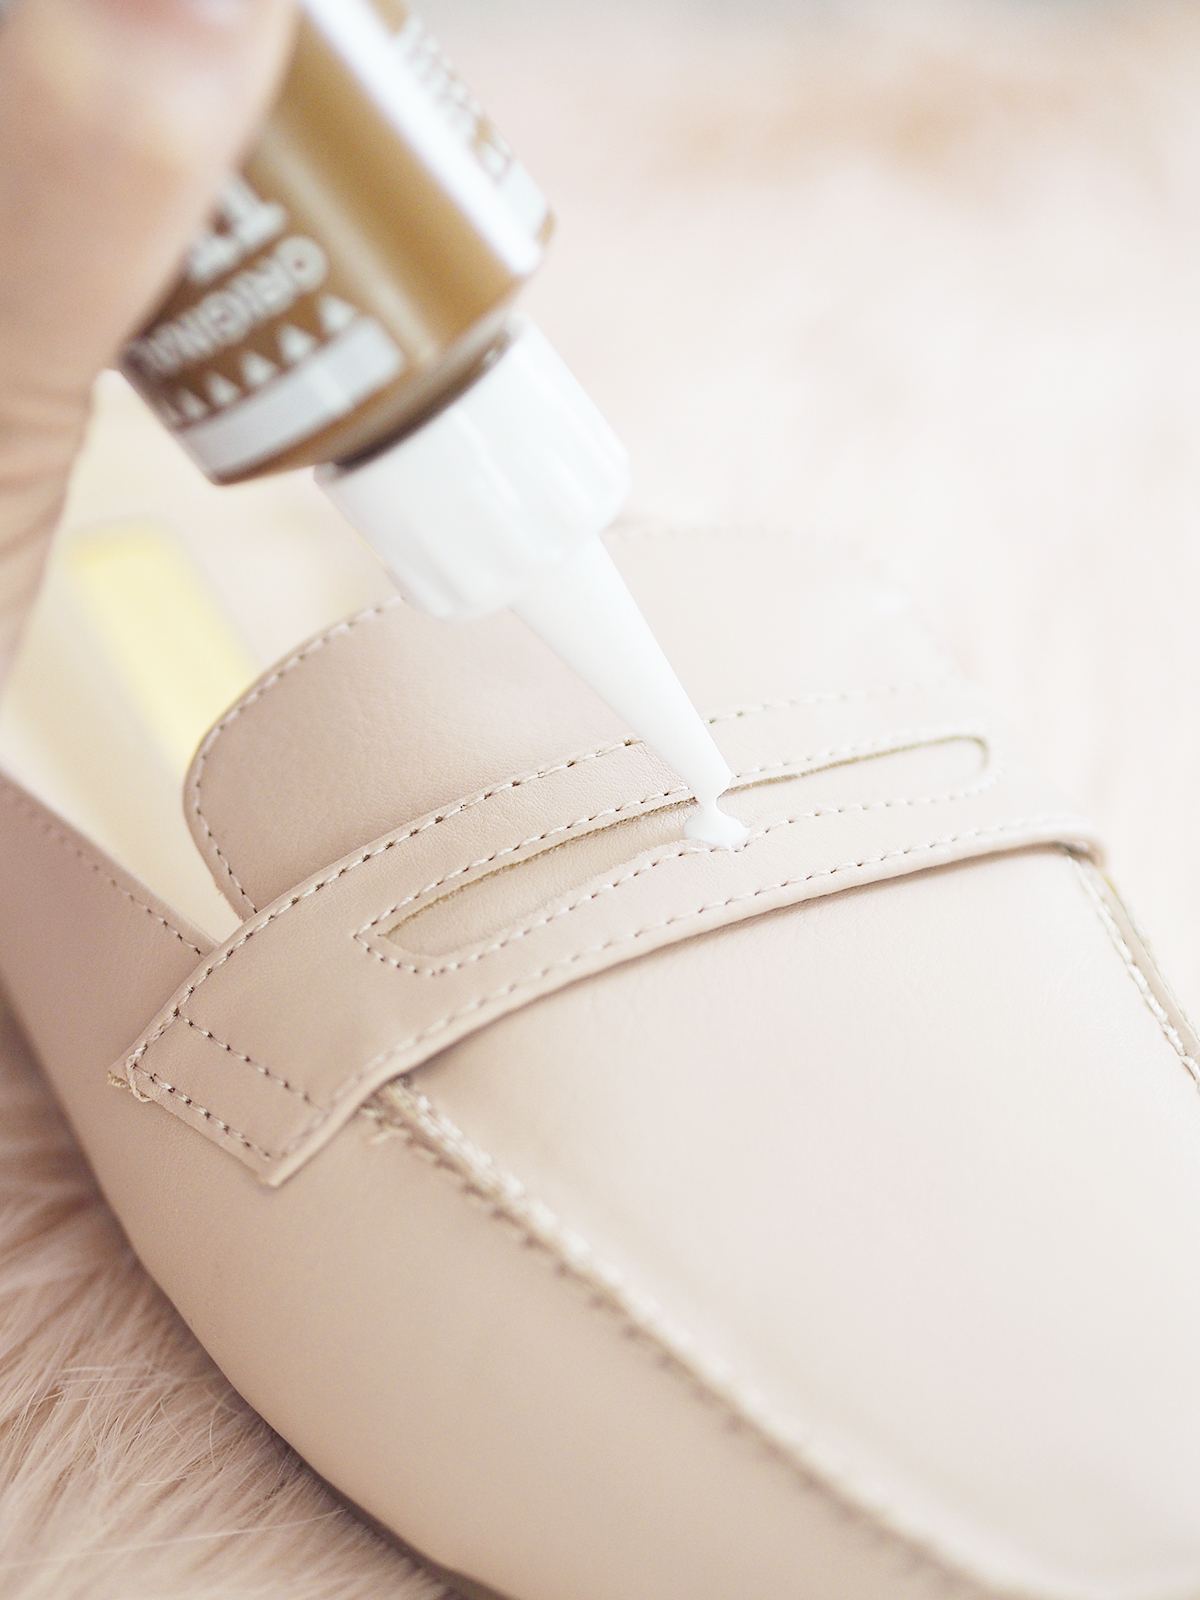
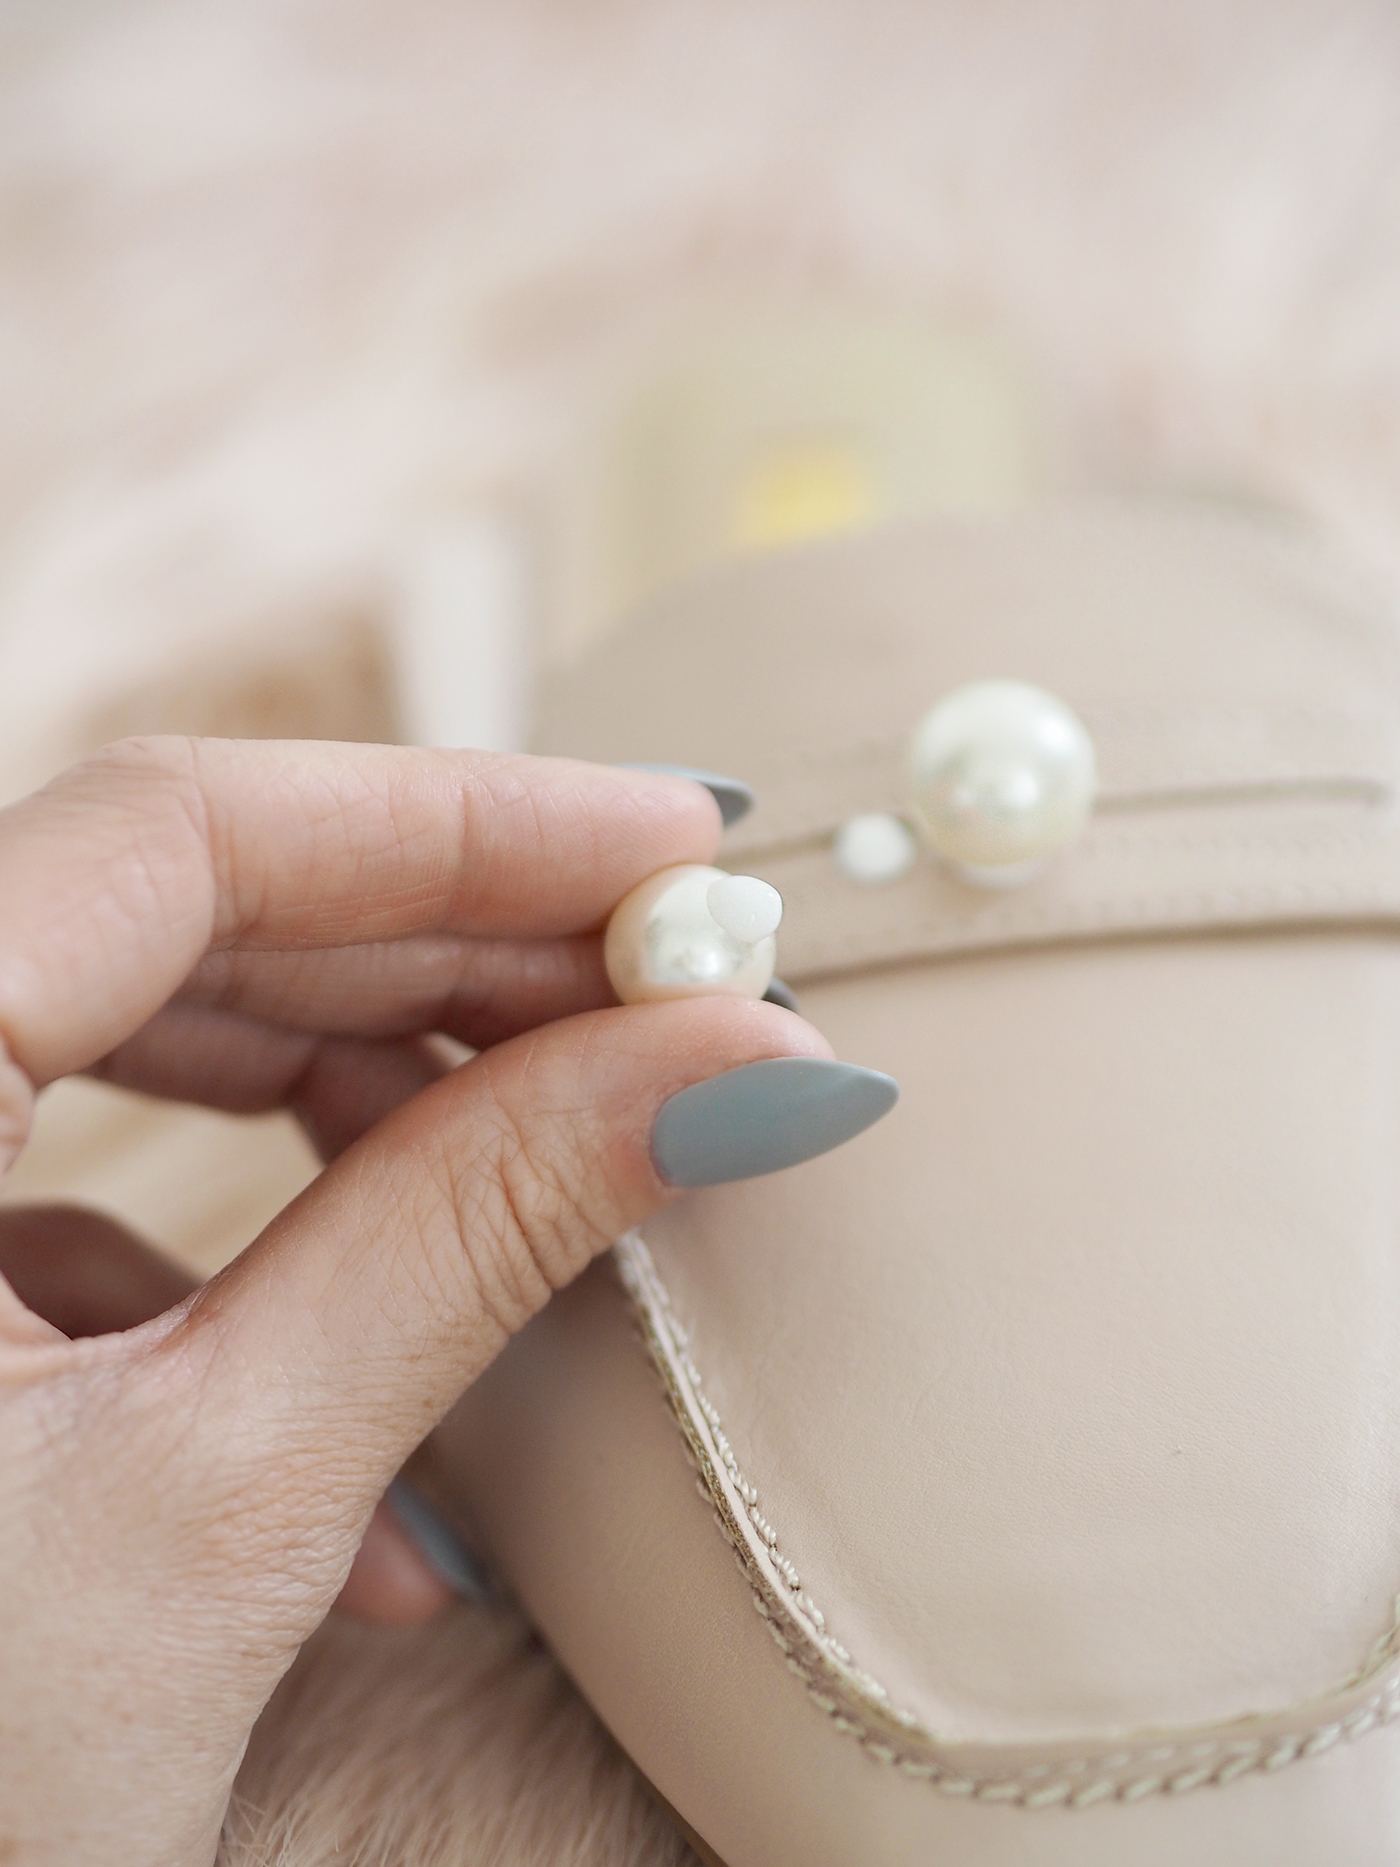
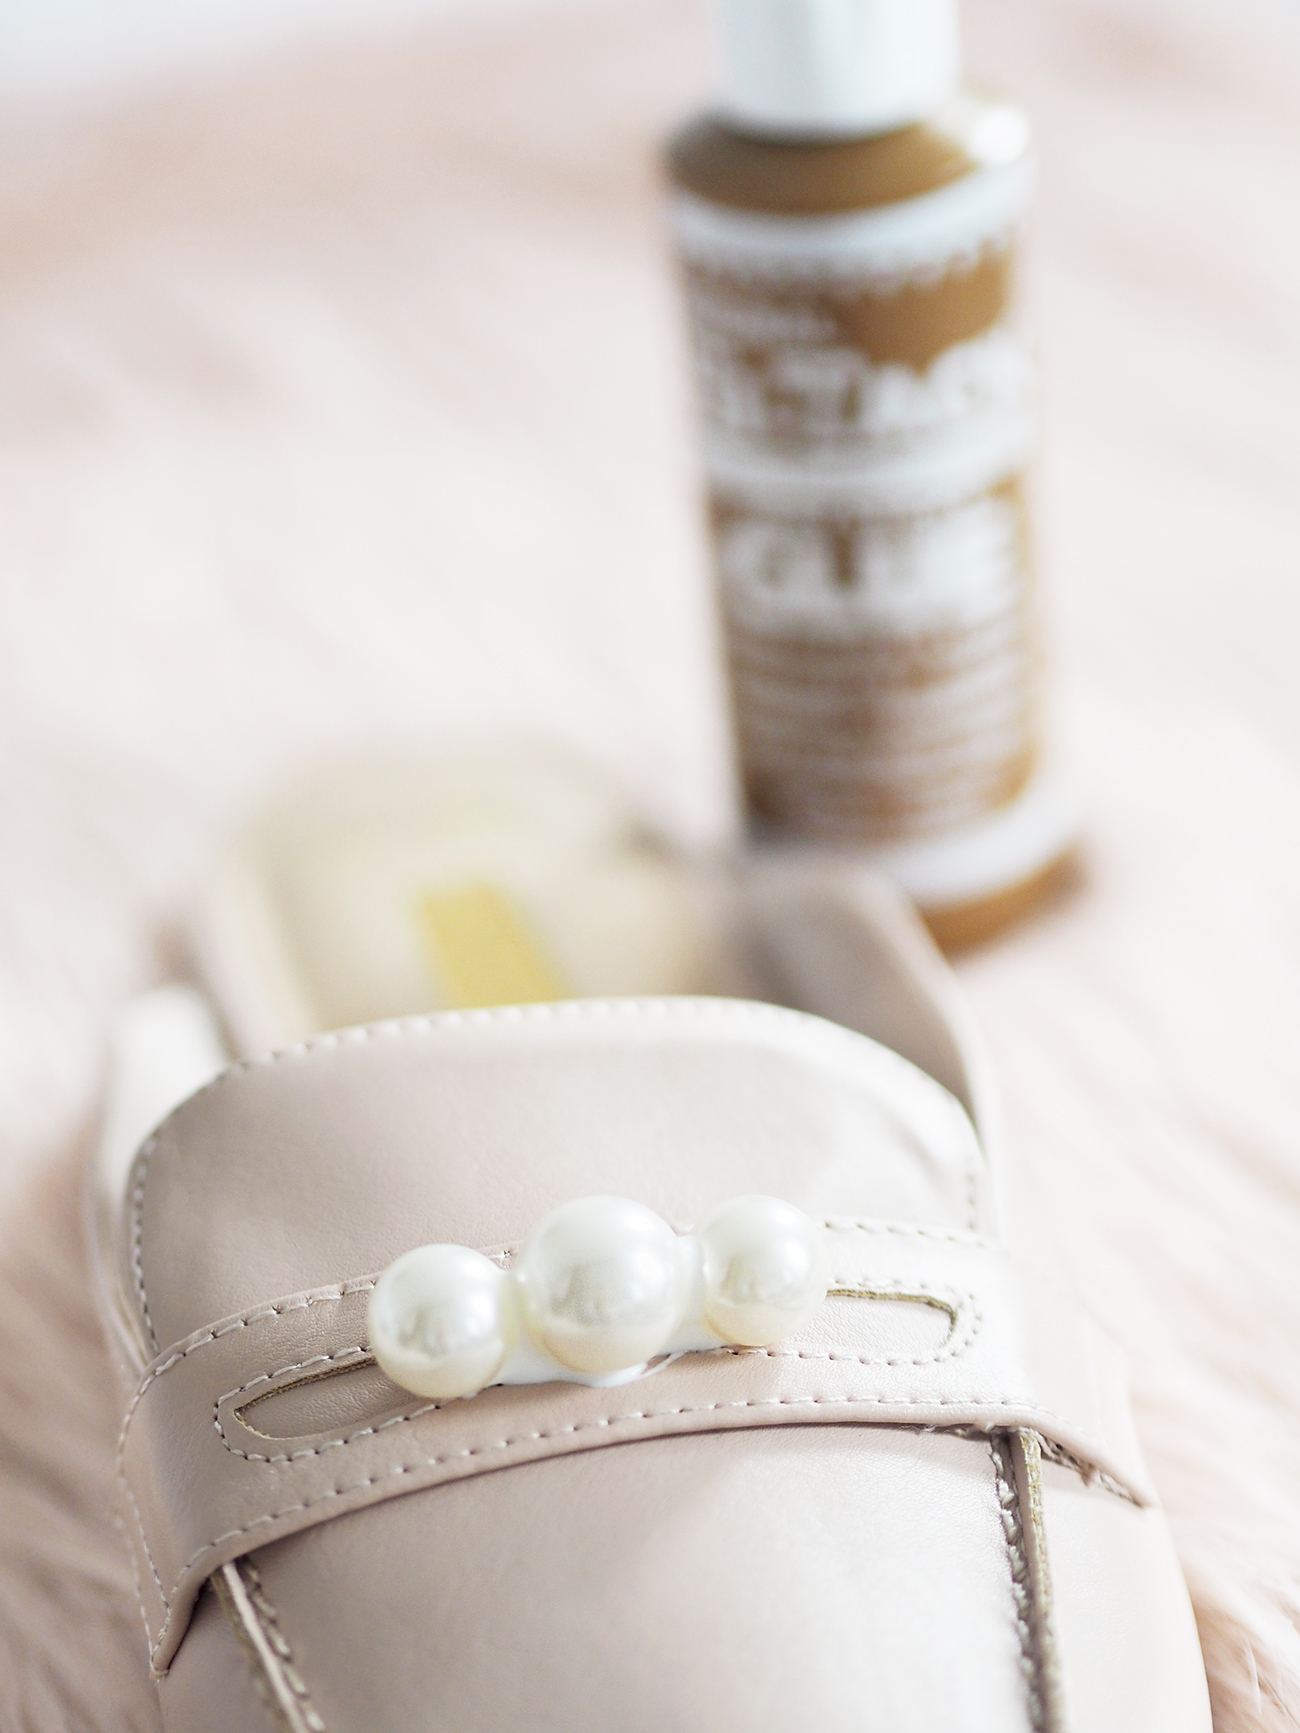
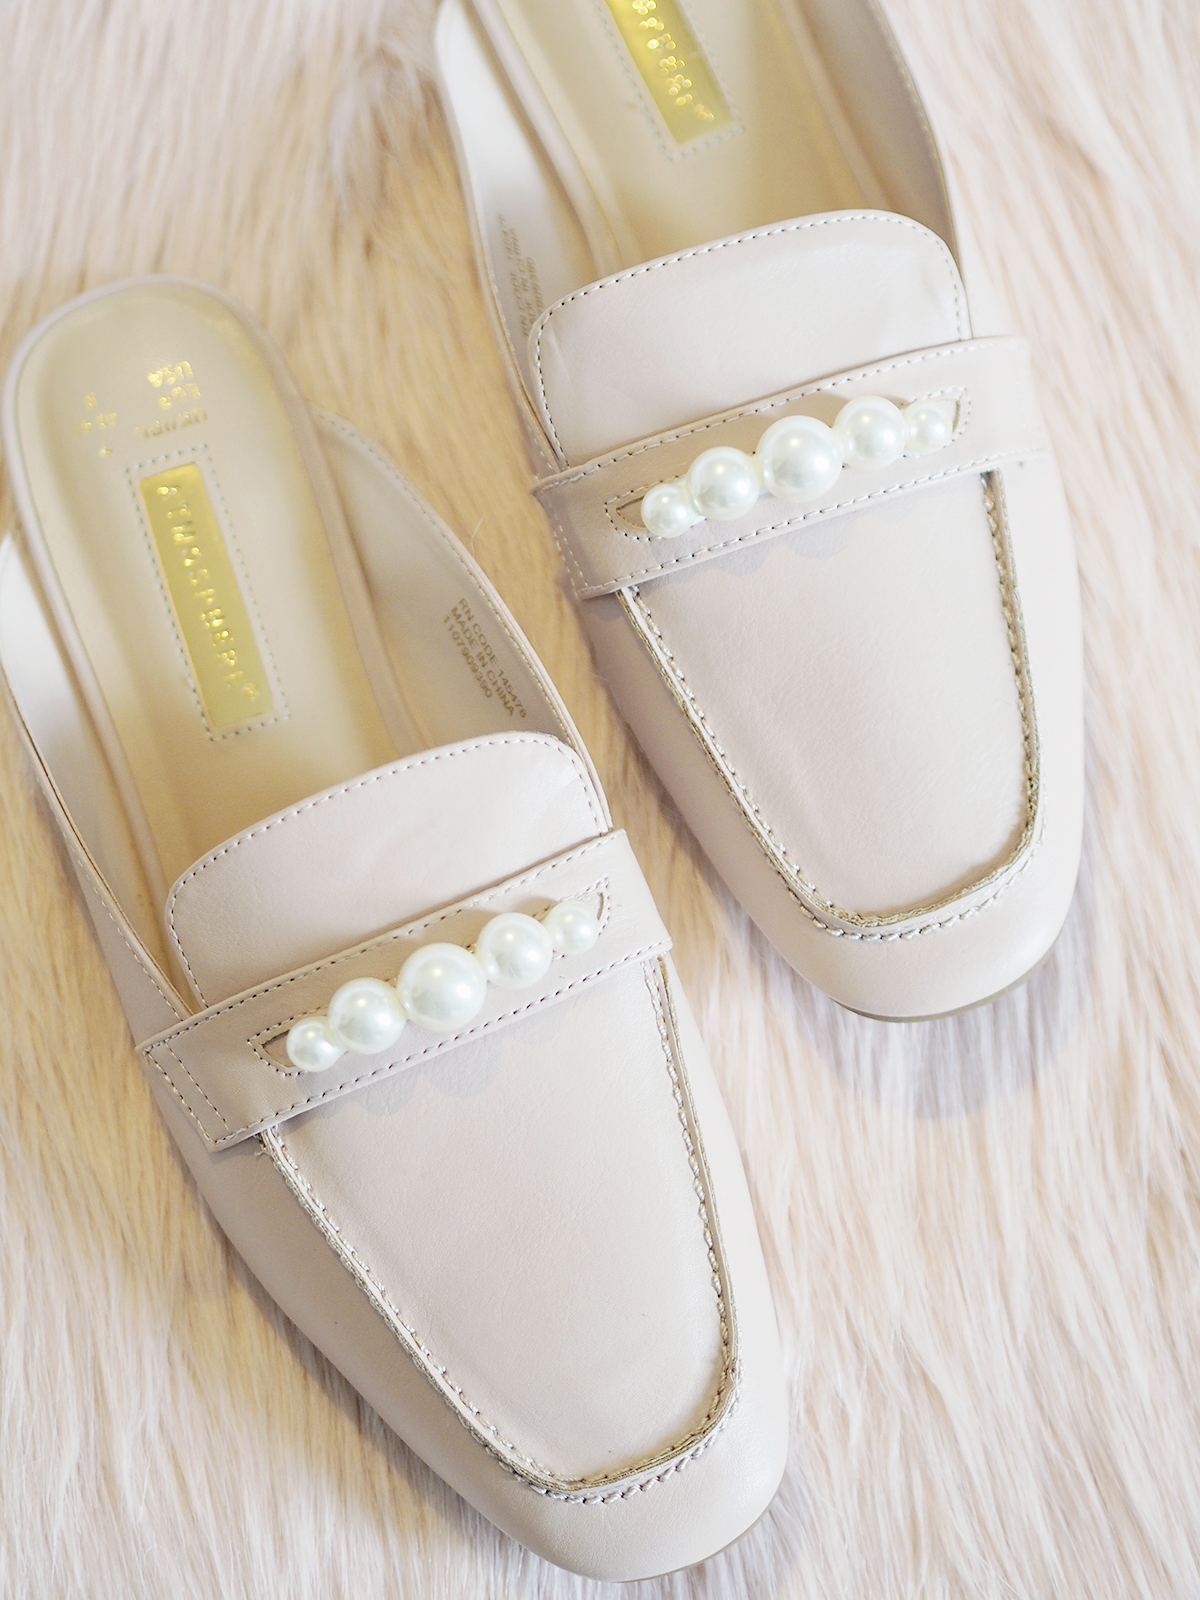
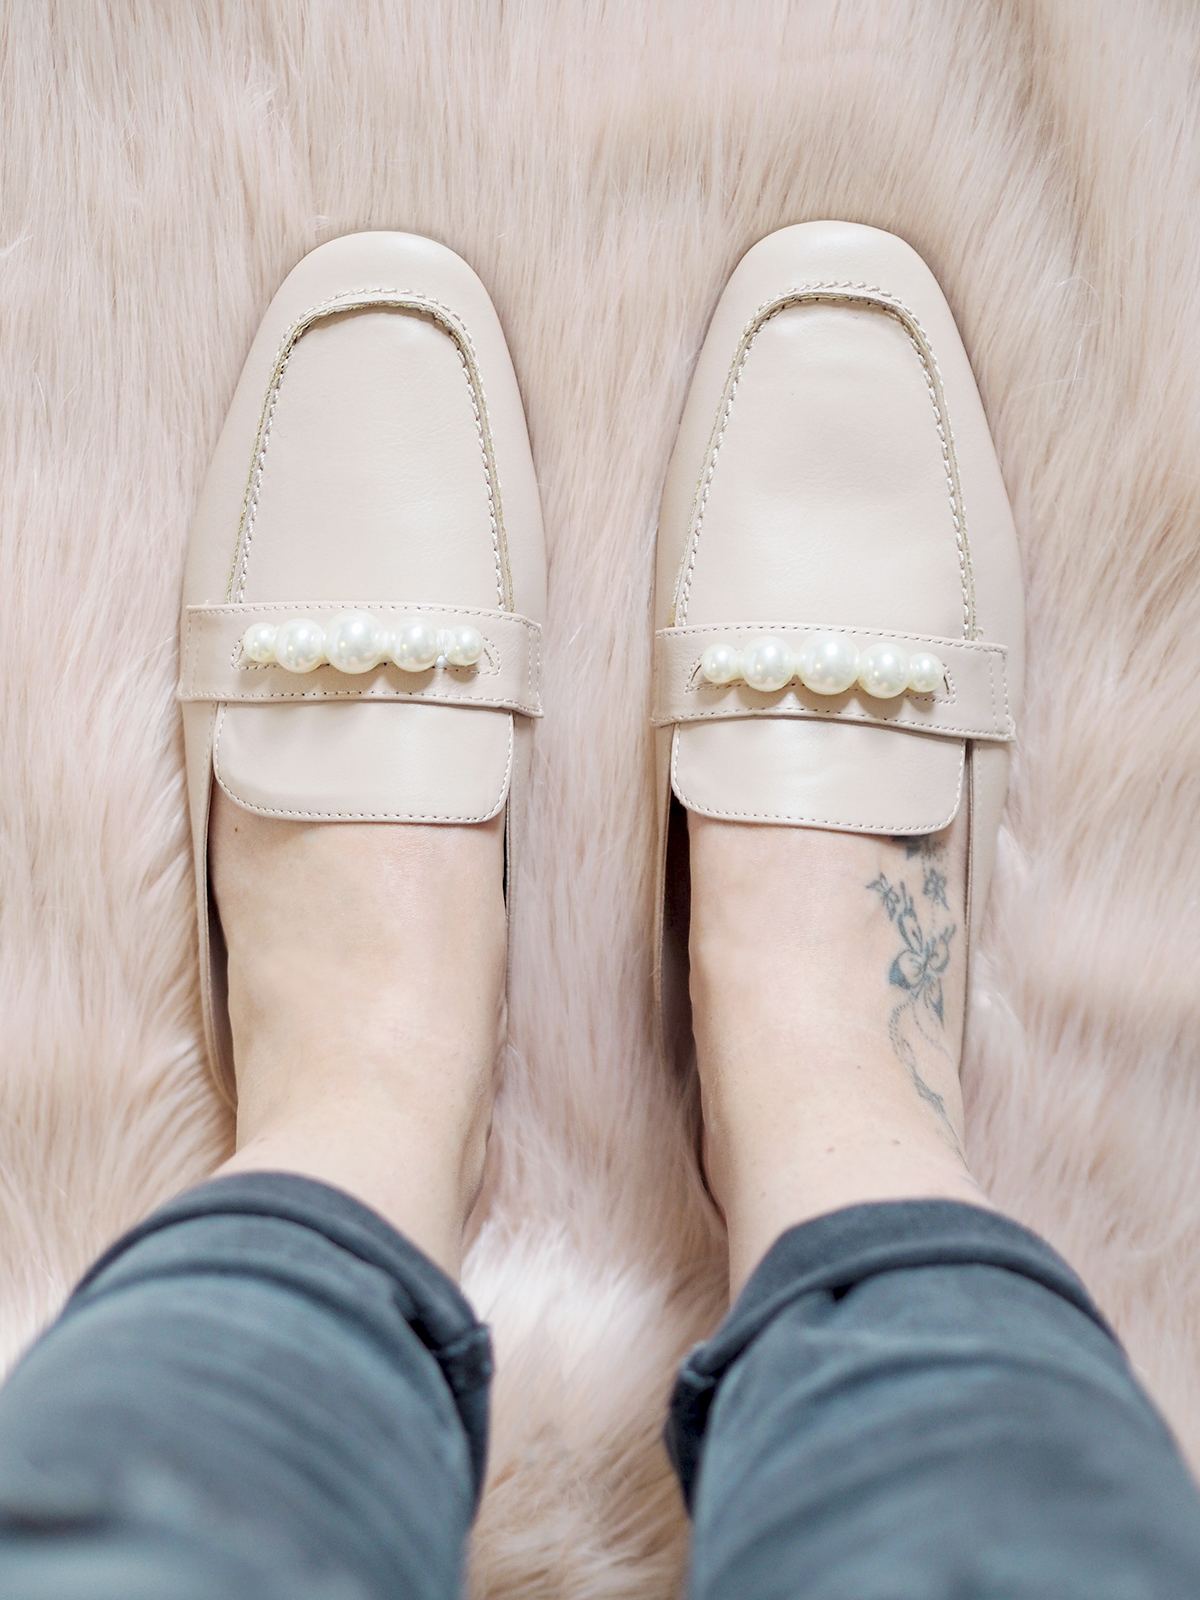
 I hope you've enjoyed my pearl embellished loafers diy, its so simple to do and I think they look so pretty. The key is the right glue and also leaving enough time to dry.

If you don't fancy making a pair of pearly shoes then you can shop my selection of pearl decorated pieces below.

Also check out all my other DIY Posts too.


Happy DIYing!

Debs

x


Bang on Style

All posts

1 Comment

  • Jelka March 5, 2018 at 7:28 am

    Wow, that’s a really cool idea to make simple looking loafers more appealing and elegant. I am definitely going to try this

  • Leave a Reply

    I accept the Privacy Policy

    ×